What is a Draconic Reactor?[]
The best analogy for the Draconic Reactor is the Nuclear Reactor from IndustrialCraft 2 (IC2). It doesn't have the complexities that IC2's Reactor has, but it's a lot more dangerous and can put out insane amounts of Redstone Flux (RF). Just like IC2's Reactor, if you don't have the proper setup, it will explode. Unlike IC2's Reactor, there is no way to contain the explosion, and it has roughly a 300 block radius. The explosion will kill everything in sight, including players in Creative. Some recommendations are to put it far away or in another dimension like the Nether or The Last Millenium from Extra Utilities.
What you will need[]
First, you need the actual components to build the reactor.
| Actual Components Needed |
|---|
4 |
| Helpful Additional Items |
2 2 2 |
What does this translate to in raw materials?
| Raw Materials Needed |
|---|
5 81 16 24 999 881 400 999 457 172 |
That's 1880 Draconium Ingots and 1456 Gold Ingots!
Thankfully, you only need to visit one Chaos Island. You can't break the crystal however until the Chaos Guardian is defeated, which is a really difficult boss fight. The reward however is virtually infinite RF.
Please note: You will also need Chaotic fusion injectors. To get 10 of these, you must go to 2 additional chaos islands... which means 2 more Chaos Guardian battles.
Are you on hardmode? Well.... you may need to visit the Chaos Guardian a few more times. Let's say... at least 25 times, most likely more. You know what, to be safe, 30 times... Have fun! (There are recipe changes for the injectors and reactor parts).
Construction[]
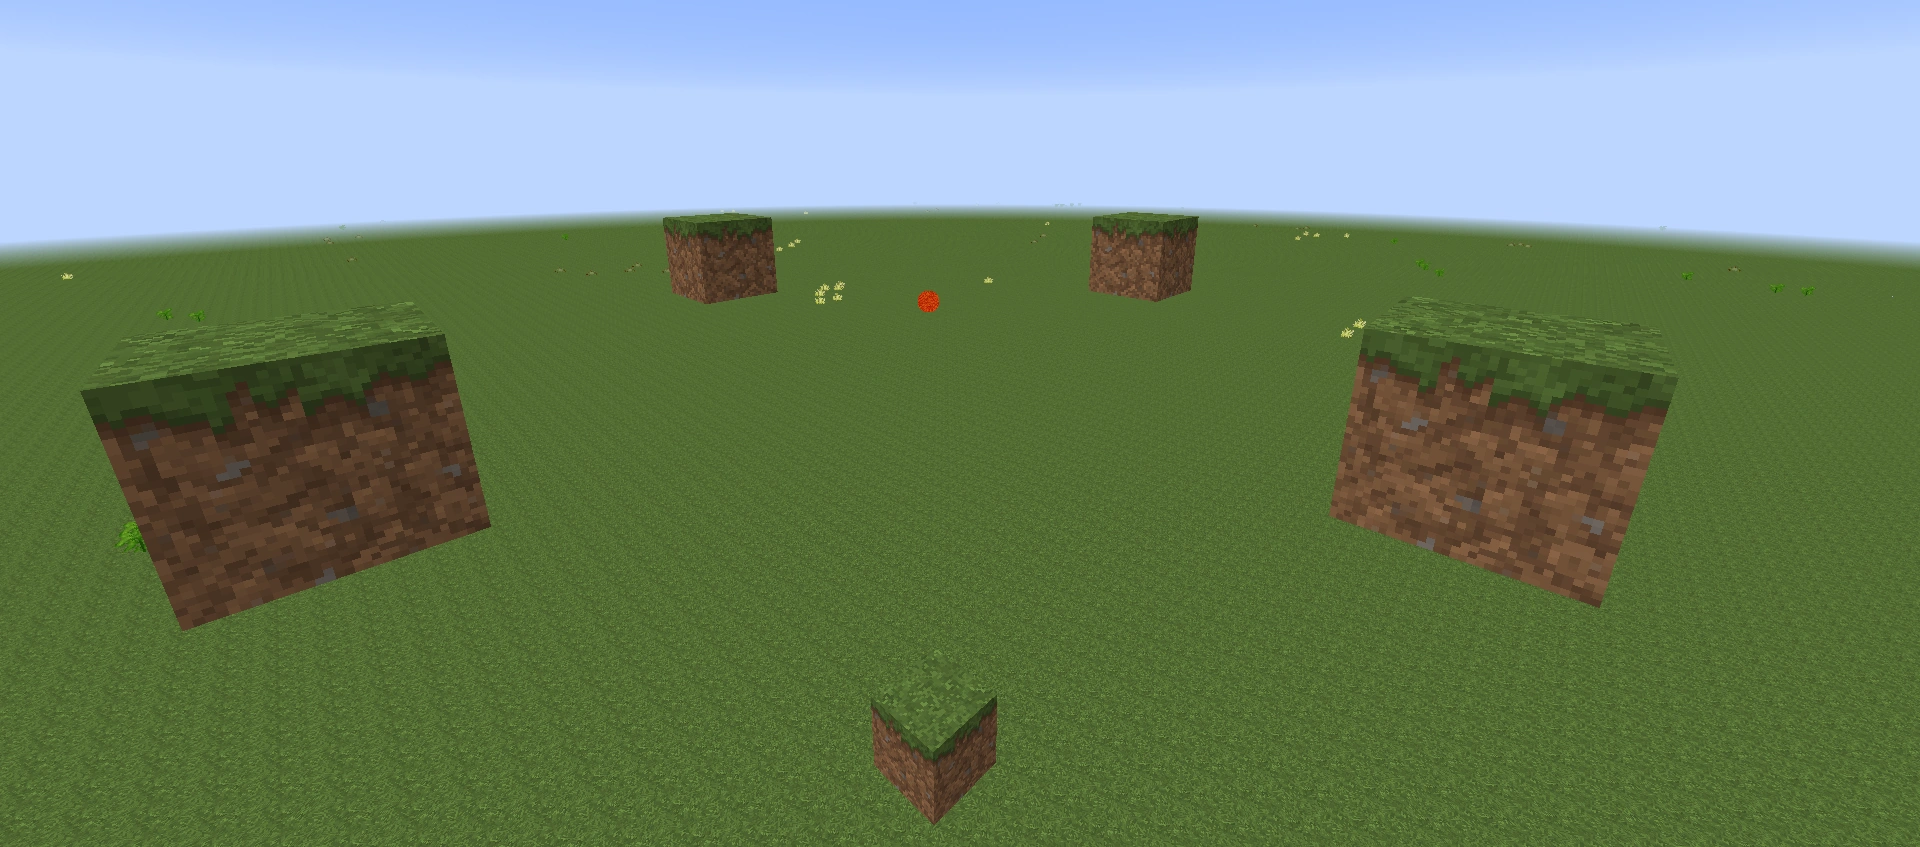
The core is just a tiny little ball right now
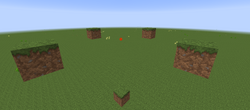
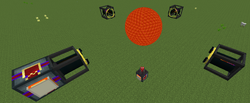
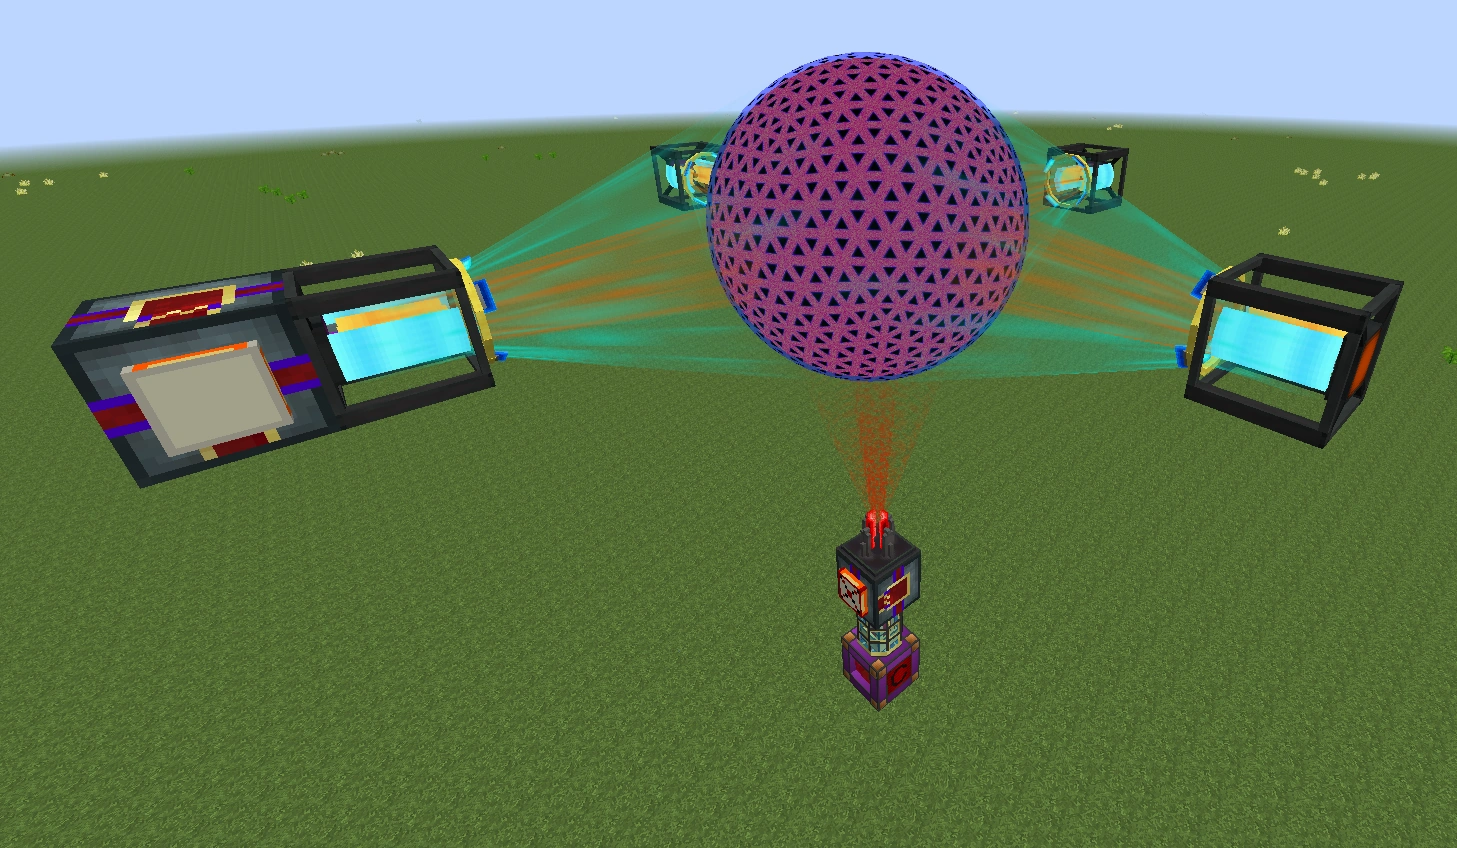
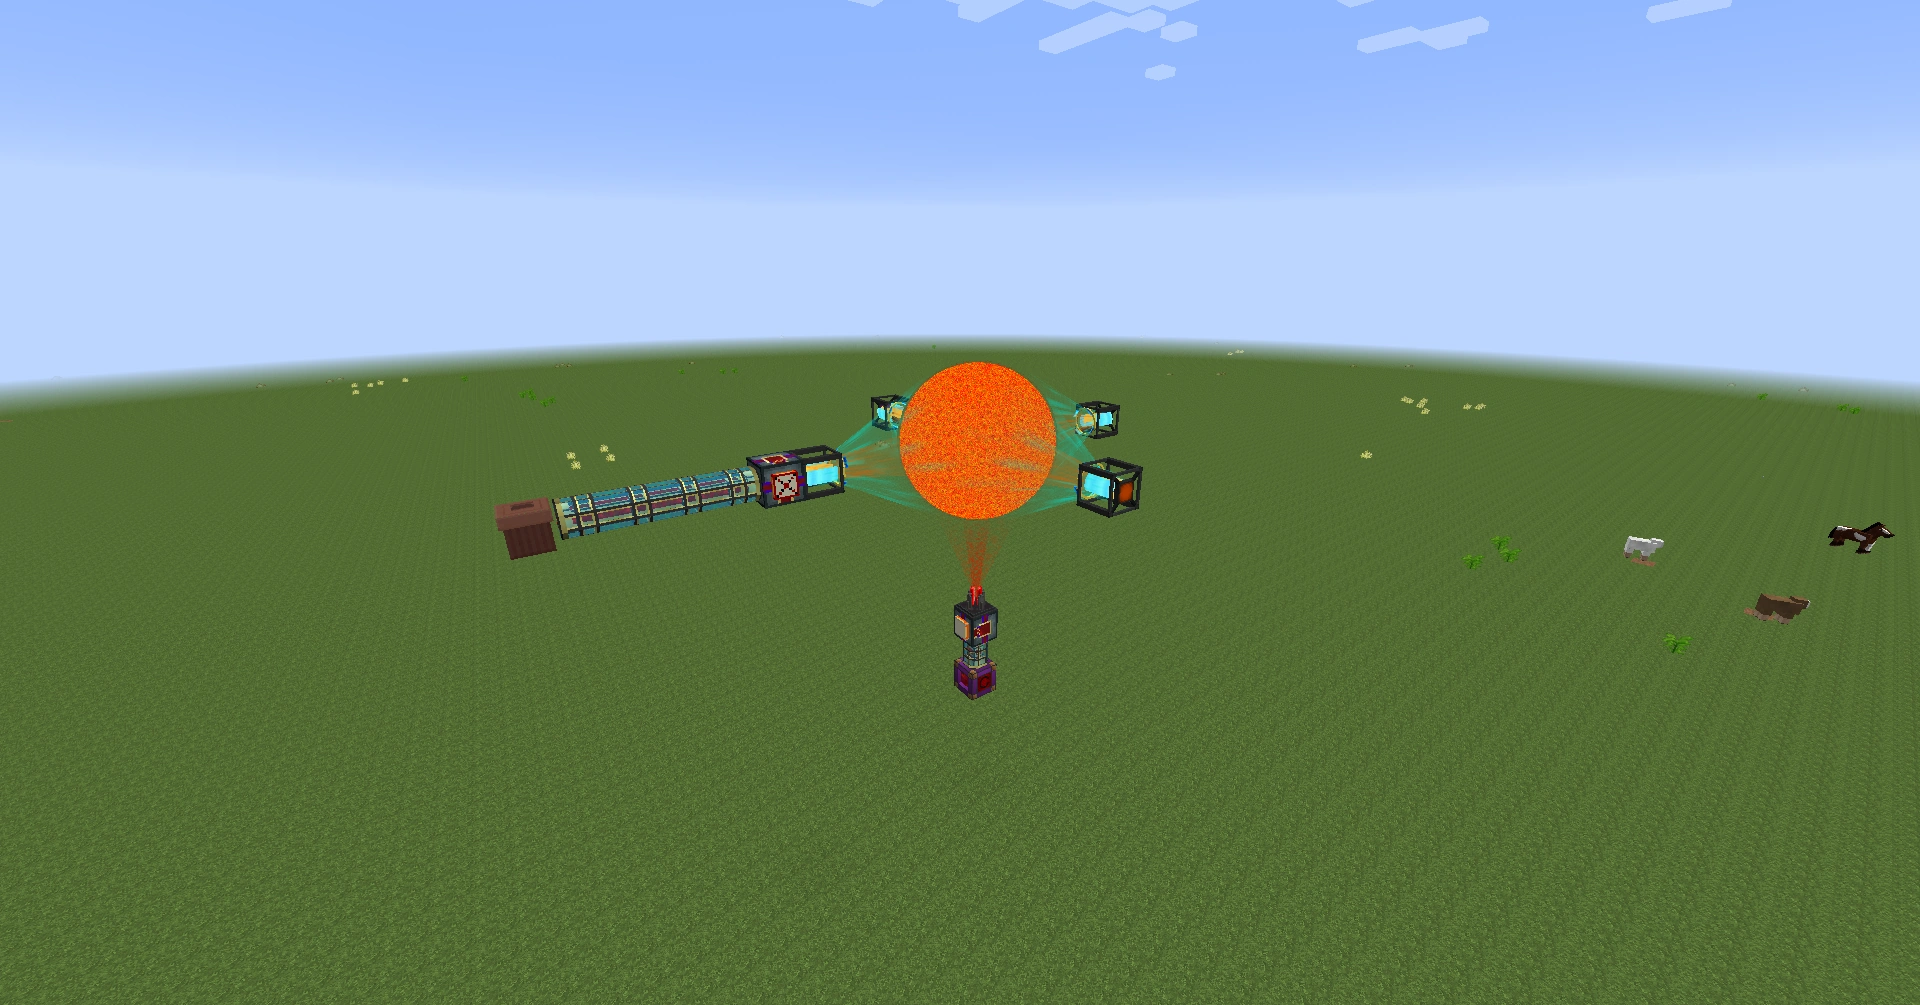
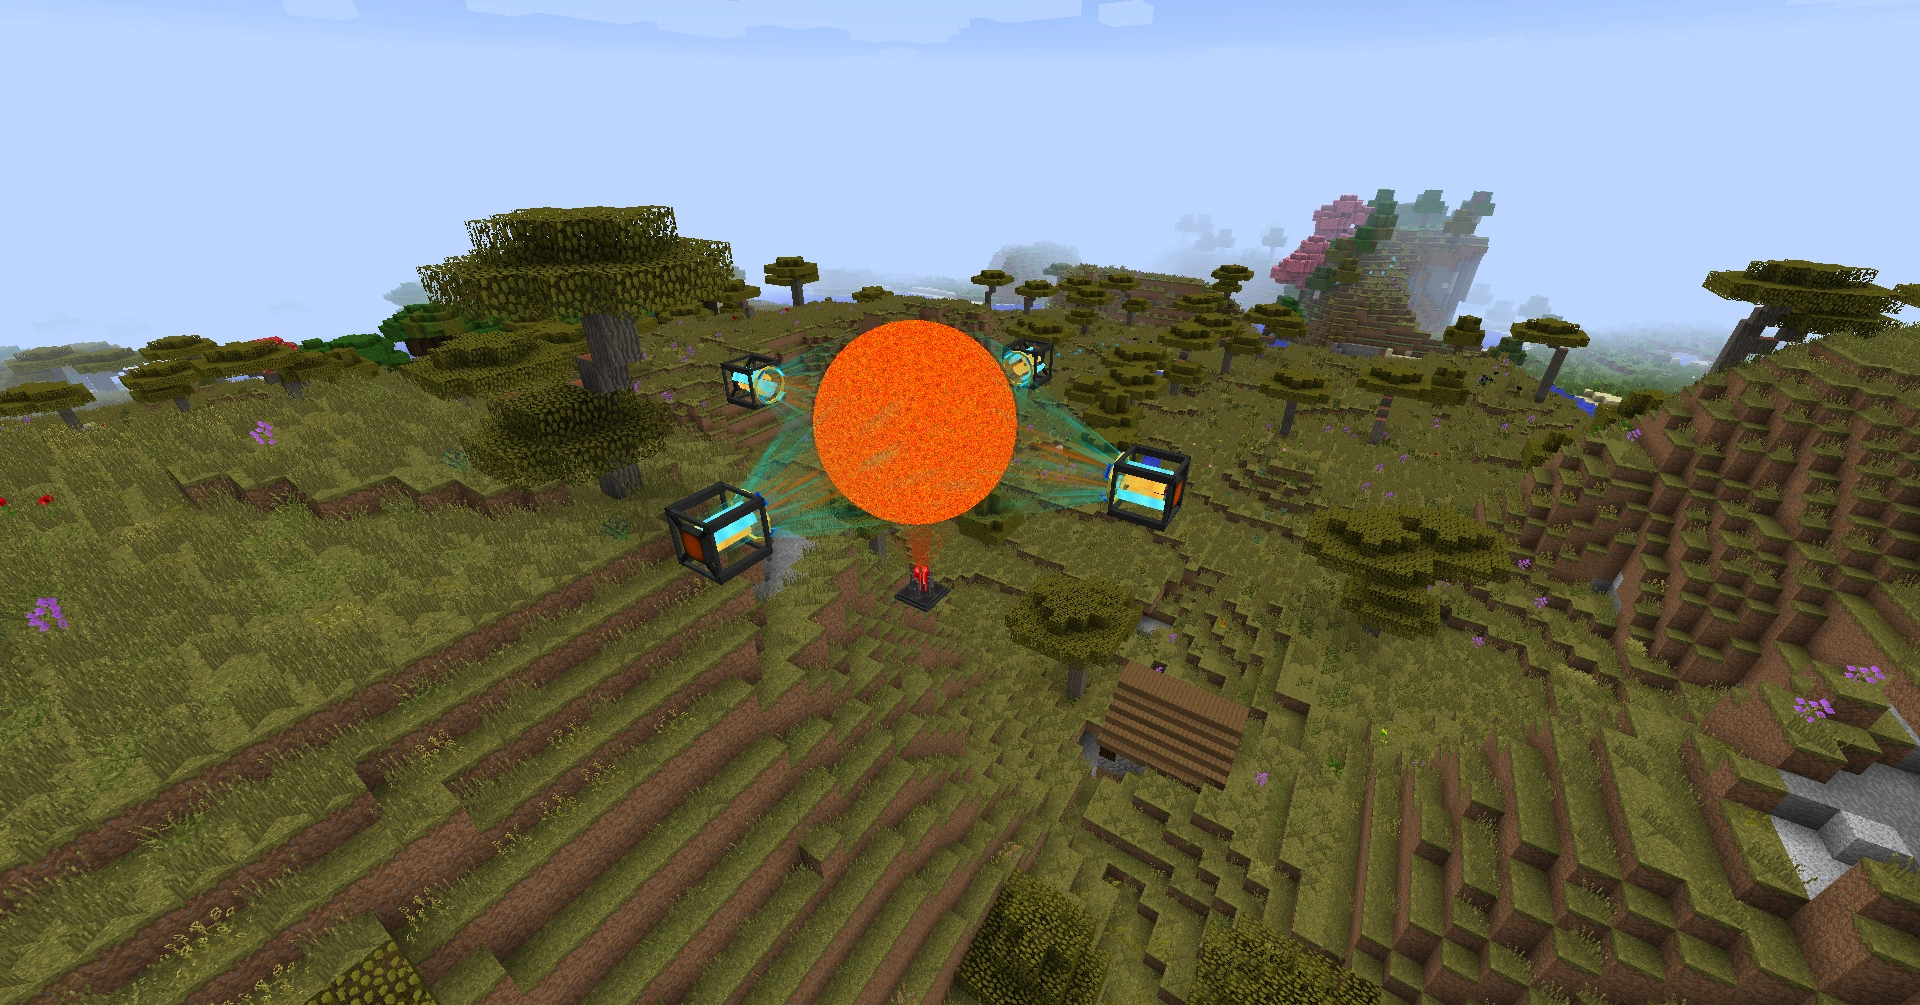
First, you place the Draconic Reactor Core where you want the center of your reactor to be. This is where the actual reaction will take place, and it will grow depending on the temperature and fuel you put in it. Next, you take 4 Reactor Stabilizers and place them in a ring around the core, the recommended distance being 5 blocks. They can be one block above or below the core, and can be up to 8 blocks away, but must be in the same setup otherwise. They can also be placed vertically around the core. They must have a direct line-of-sight to the core when placed, otherwise they will not register. Some tips when building: Sneaking while placing them makes them face towards you. Placing them 5 or more blocks away ensures that the reactor will not engulf the Stabilizers, as they do not work if they are inside the reactor.

The Stabilizers, forming a ring around the core

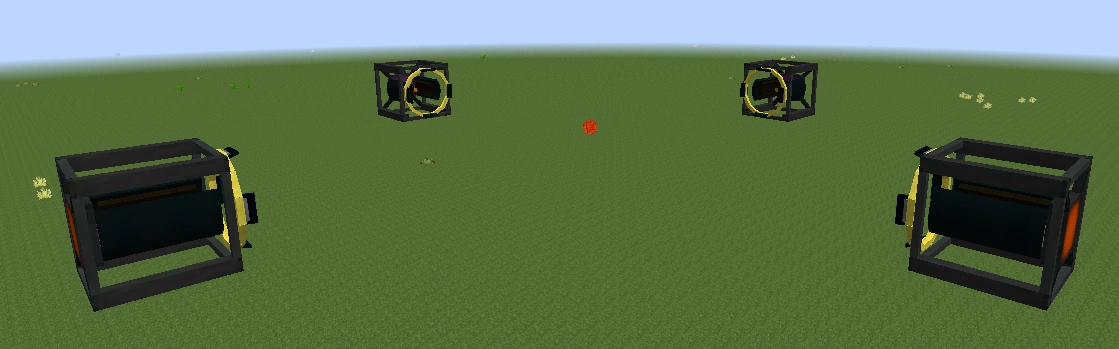
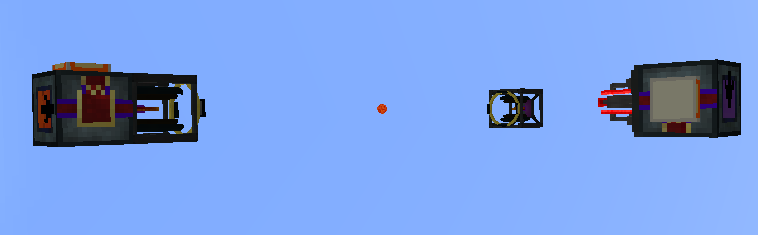
Placing an Energy Injector underneath the Core
Once you have the ring built, right click on any of the Stabilizers to bring up the Reactor GUI. If there is no GUI, then you have to replace the Stabilizer. On the right of the GUI is the status of the Reactor, if it says "INVALID SETUP" then you have to find the stabilizer that's not connected, otherwise it should say "Offline". Now, you need to place an Energy Injector on one of the sides of the core that doesn't have a Reactor Stabilizer. This block is important, because it feeds RF back into the Reactor, which is explained in detail later.
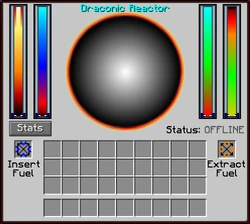
The GUI when the Reactor is off
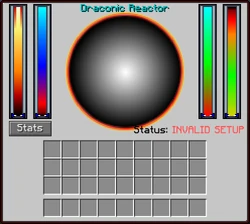
The GUI when the Reactor has an Invalid Setup

Safety First[]

Flux gates with Potentiometers
Before powering on the reactor, some additional safety features are probably a good idea. The Reactor doesn't have a concept of "limits", and will give or take as much RF as it can. This will create an unstable reactor, and eventually an explosion. It's a good idea to use a couple of Flux Gates, which limits how much RF/t can flow through it. It is also adjustable with a redstone signal, therefore it may be a good idea to place a Potentiometer on each one. The Flux Gate is directional, with the side with the purple square being the input, and the side with the orange square being the output. Place one Flux Gate with its Purple side on the back of one of the Stabilizers, then place a second Flux Gate with its Orange side facing the bottom of the Energy Injector. This allows you to control how much RF/t is going out of and into the reactor, respectively.
Besides this, another way you can stay safe is to place it 50 blocks or more above the landscape. This will make it where, if it explodes, it will destroy all your equipment used to keep your reactor stable as it would in both cases, but it won't devastate your base and it won't spawn a ton of lava! That's a fair trade to me! You could also use dislocator receptacles in order to easily get from the reactor to the ground and vice versa.
Powering Up[]

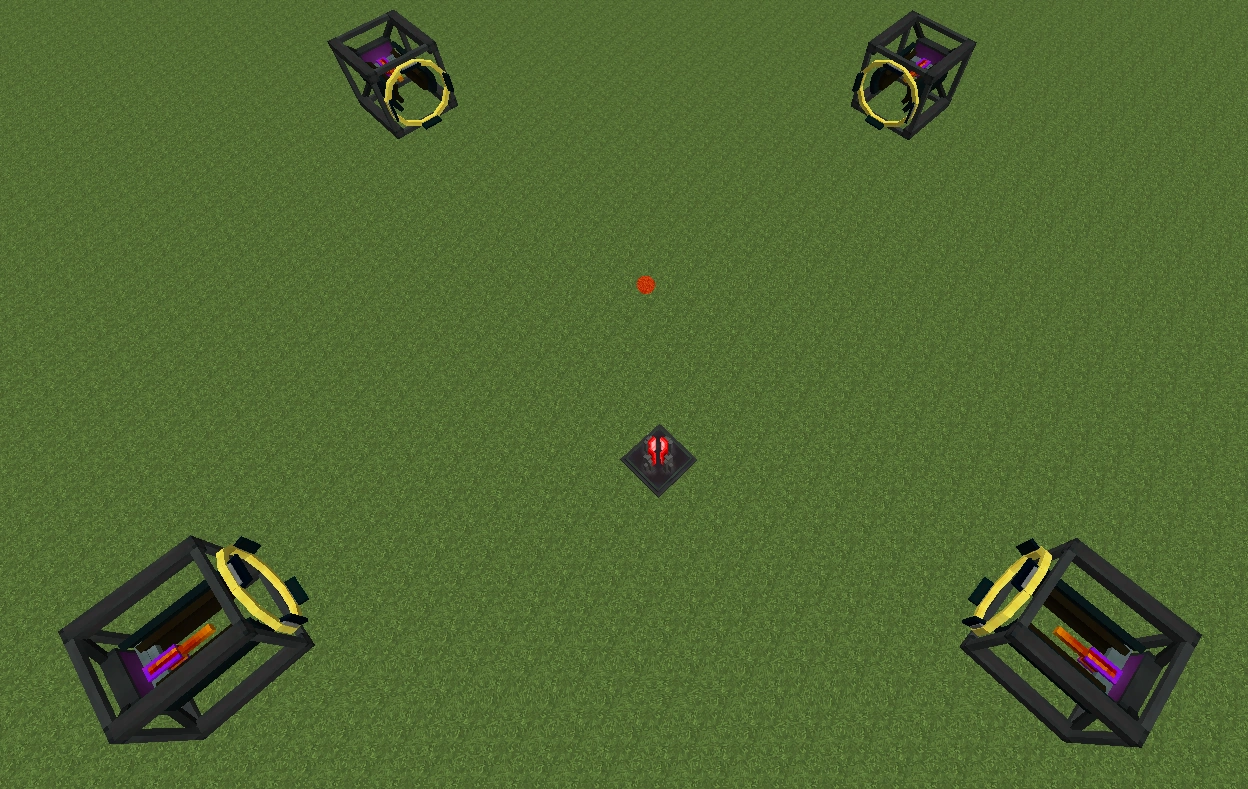
A Fully Fueled, but unpowered Draconic Reactor

A Draconic Reactor, ready to Activate
Now that you have a fully built Draconic Reactor, we need to insert fuel. The Draconic Reactor runs off of Awakened Draconium Blocks, and can hold up to 8 blocks of fuel. Once you put in the fuel, you may have noticed the core grew in size. This is a hint that you need to have the proper space for the core, otherwise it will not be stabilized properly. If it can't be stabilized properly, the reactor will explode.
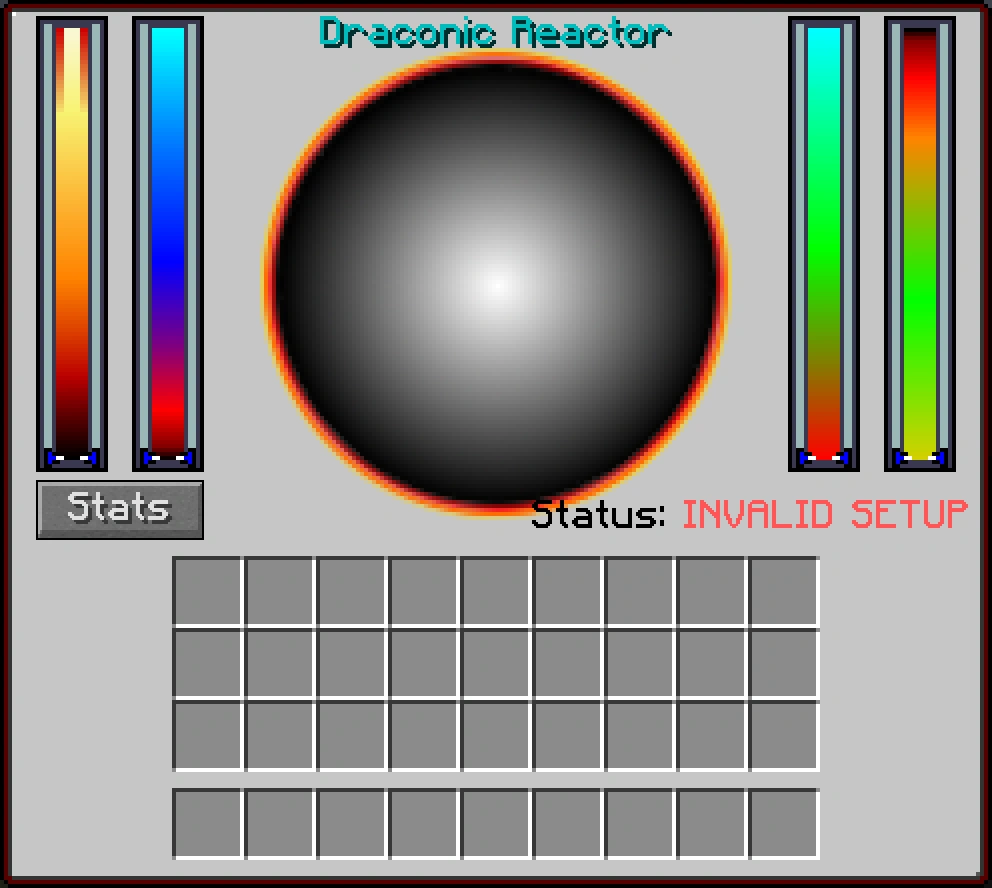
Before we power it up, it's worth noting some minor information about the GUI. The left most bar displays the core temperature. Once this is past 2000C, the reactor will explode if you break any part of it. The bar on the middle right displays energy saturation, you do not want this to be 0 while the Reactor is on, as it will be trying to generate infinite RF/t and explode.
Now that the Reactor is loaded with fuel, we can hit the button on the bottom right called "Charge Reactor". Once this is pressed, the Reactor now needs a great deal of RF in order to charge up. This has to be inserted through the Energy Injector. If you followed the section on "Safety First", you can adjust the Flux Gate to allow more RF/t to flow into the Reactor. Once the Reactor has charged up it's Containment Field (the middle left bar) to 50%, Energy Saturation (the middle right bar) to 50%, and it's Temperature (the far left bar) to 2000C, the reactor can be activated. It is recommended that you read the section "Keeping it Stable" before activating the Reactor. Once it's on, RF is extracted through the Stabilizers, and injected through the Energy Injector.
Note that the Energy Injector can consume virtually infinite RF/t, and will use the Energy consumed in one tick to either charge its Containment Field, its Saturation or to heat itself. This means that, if you connect the Energy Injector to a Power source capable of supplying infinite RF/t (such as an Energy Core), it will drain it completely in one tick without even beginning to charge the Energy Saturation.
Keeping it Stable[]
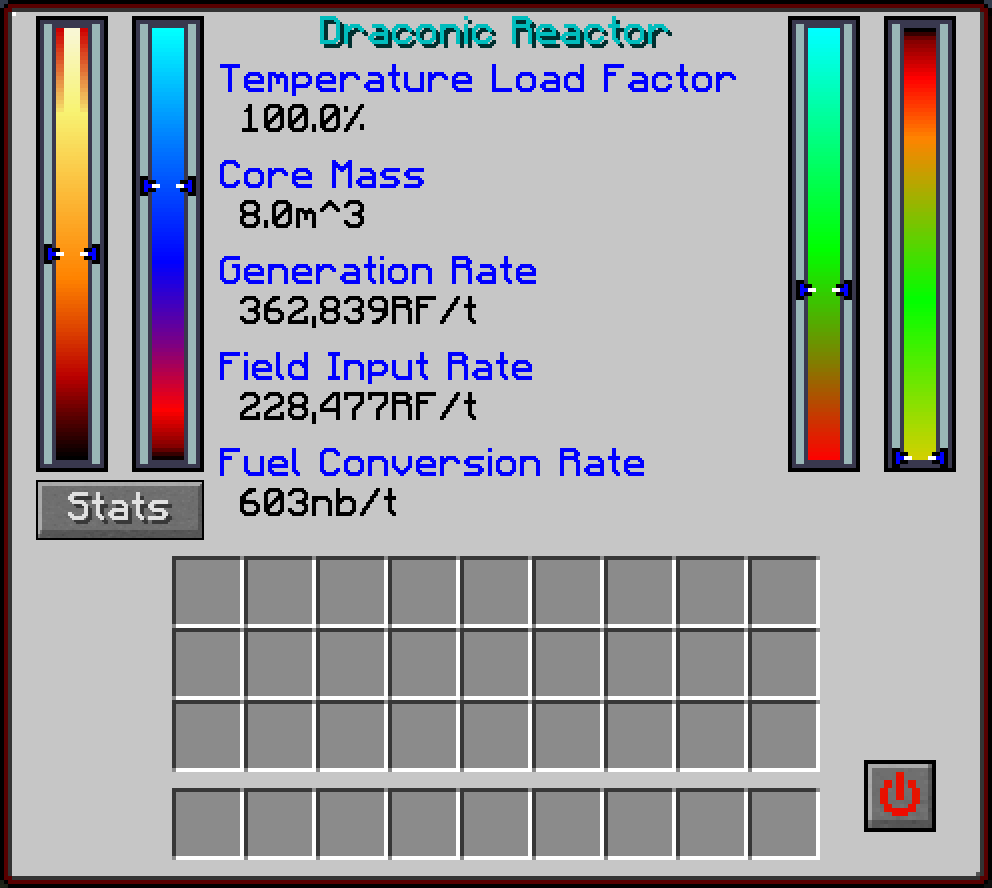
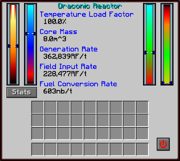
The GUI of a working reactor
The last thing anybody wants is their base turning into a nuclear wasteland from an unbalanced Draconic Reactor. This requires understanding the GUI and the numbers behind it all, quite literally. Press the "Stats" button and the middle of the GUI will display a bunch of numbers about the Reactor. Combined with the 4 bars, this gives you all the information you need to know about your reactor to keep it from blowing up.
First, let's start with the most important numbers. The Containment Field is the one thing keeping the Reactor from vaporizing you and the surrounding land into nothing. It is represented by the middle left bar, and the Field Load Rate. The stronger the Containment Field is, the more RF/t you need to keep it at that level. The Field Load Rate tells us the current RF/t we need to inject into the Reactor via the Energy Injector in order to keep it at the level it's currently at. There is no limit to how high or low you can make the Containment Field, but you need to make sure it stays above 0%. The lower the level of the Containment Field, the less RF/t it uses and the more efficient your reactor becomes, but it also reduces the wiggle room on the output.
The second most important thing about the Reactor is Temperature. The more energy you draw from the Reactor, the hotter it becomes, producing more energy. This is represented by the far left bar and the "Temperature Load Factor" number. Hotter is better, as it means your reactor will use less fuel. However, if it goes above 8000C, the Temperature Load Factor begins to go up at an exponential rate. This means it puts more and more stress on the Containment Field the hotter it gets. This is bad news, so the optimum temperature for running your Reactor is 8000C. Additionally, if the Temperature drops below 2000C, the reaction becomes too cold to work anymore, so the Reactor simply shuts down. Additionally, you cannot break any blocks of the Reactor unless the Temperature is below 2000C.
The third more important aspect is Generation Rate and Energy Saturation, which is represented by the middle right bar. When you pull RF from the Reactor, you are actually taking it from its saturation. The Reaction then speeds up to try and replace this missing energy. How much energy the Reactor is producing is represented by the Generation Rate. The higher the Saturation, the lower the Generation Rate. Additionally, the higher the Generation Rate, the higher the Temperature of the reaction goes.
Fourth and finally, there's Fuel Consumption. This is represented by the far right bar or Fuel Conversion Level, Fuel Conversion Rate, and Core Mass. Core Mass is how much fuel you initially loaded into the Reactor Core. It doesn't change at all unless you insert or extract fuel and byproducts. Fuel Conversion Level tells you how much fuel you have left, or how much fuel has been converted into chaos. Finally, Fuel Conversion Rate is the most important number here. It tells you how much fuel is being spent per tick on keeping the reaction going. A perfectly stabilized Reactor burns 0 nb/t(1mB=1,000,000 nB). The longer the Reactor stays at certain power output, the more the temperature rises, meaning the more RF/t gets generated. Since it's a constant output, the excess goes into the Saturation, lowering the Generated RF/t. This lowers the Fuel Conversion Rate, and means that the longer the Reactor stays balanced, the longer it lasts without needing to be refueled.
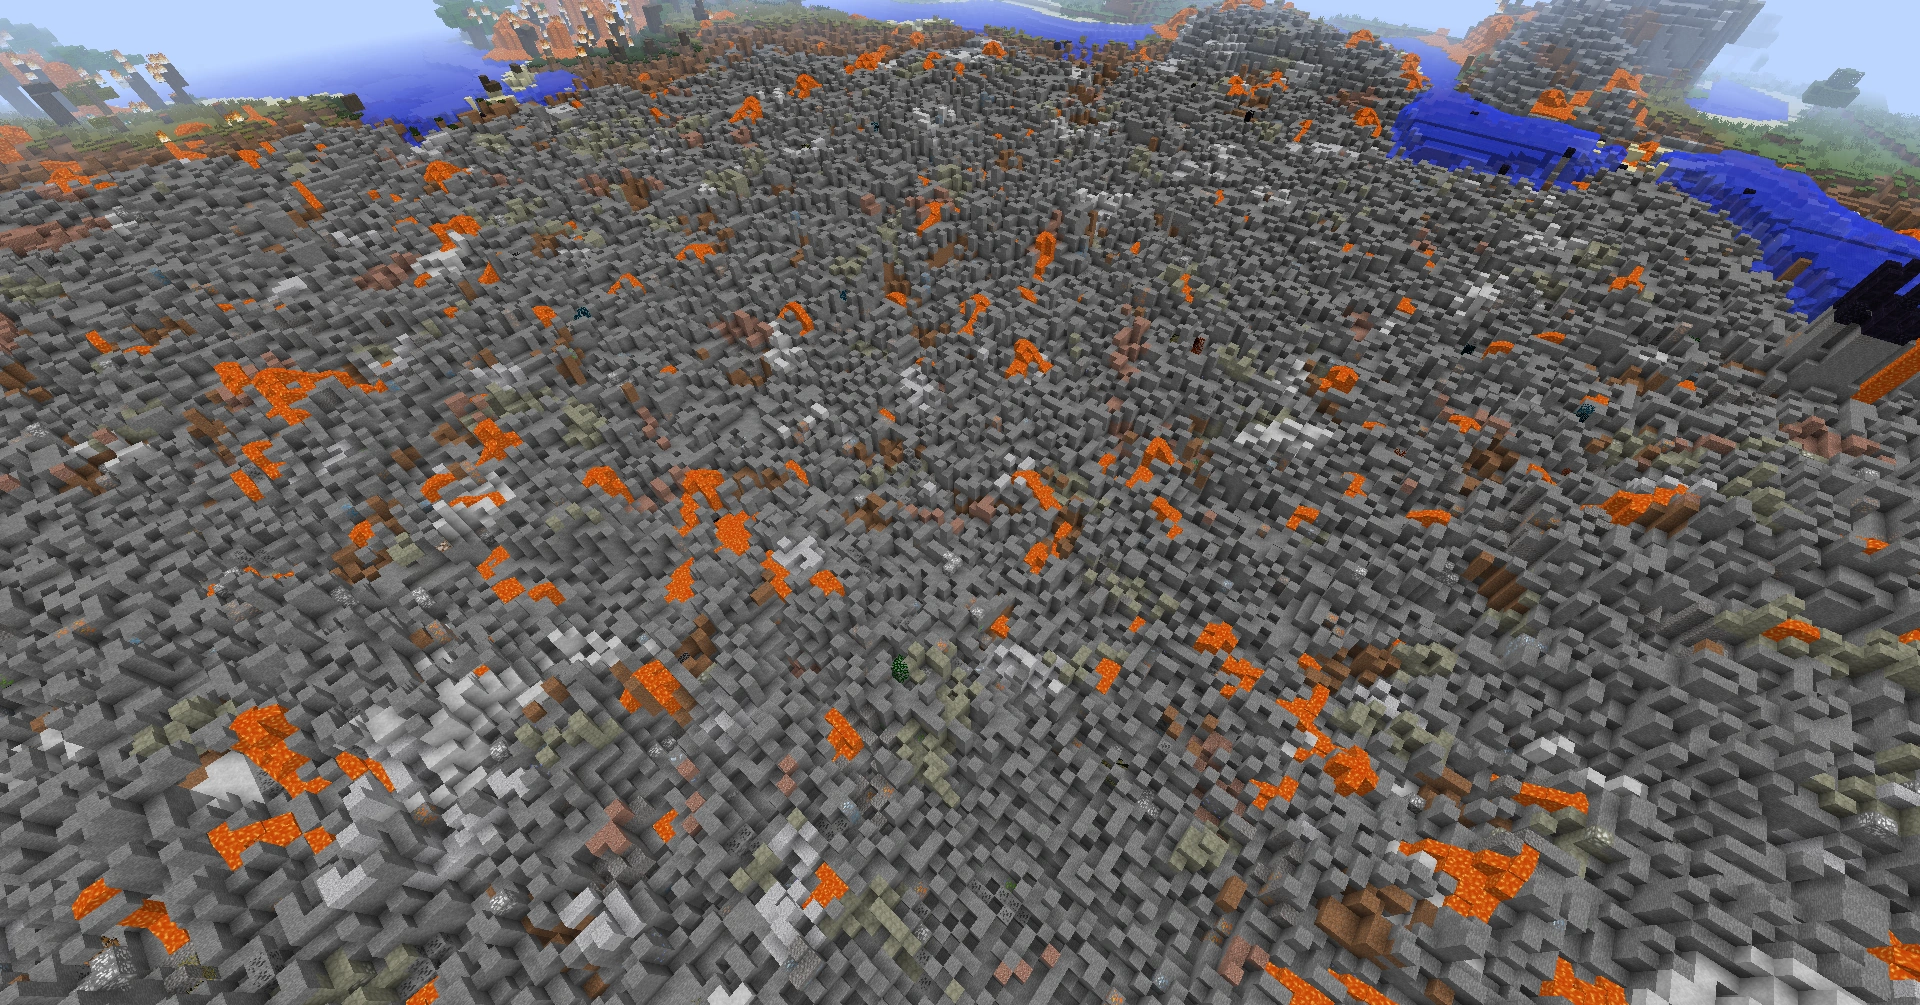
Going Boom[]
If the Reactor explodes, panic. There's going to be nothing left but a hole. So, to make things simple, don't make it go boom. If it does go boom, and you're wearing a full set of Draconic Armor, then you might survive.

You don't want to see this

Likely the last thing you'll see
Here's my base...
Base? What base? That hole over there?
